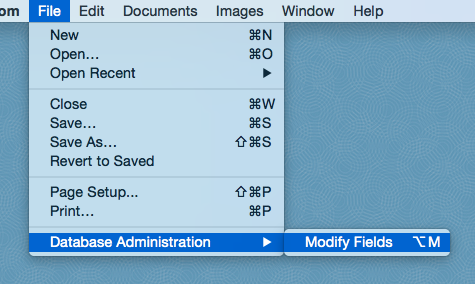
You can access the Modify Fields screen by either double-clicking anywhere in the Browse view table, or by selecting File > Database Administration > Modify Fields.
Before creating any fields, it is important to examine your metadata load file (.DAT or .TXT delimited text file) that was included with your document production. You can open this file with any text editor (such as TextEdit on a Mac), but an easier way is to click the “Preview Load File” button.
This will open the Preview Load File window. Click the “Preview Load File” button here and select your metadata load file to view the first line of text.
The first line of text contained within the metadata load file usually (although not always) contains a list of field names separated by a delimiting character. Some of these fields may also be surrounded (or “wrapped”) with a different delimiting character, which is known as the quote character. For more information about these delimiting fields, please see the Importing Document Metadata section of Help.
Once you have determined what field names are contained in your data load file, you should next take note of what kind of data these fields contain. Often the field names will give you a clue… for example, a field named “DOC_DATE” will often contain a date, while a field named “BOXNUMBER” or “PAGECOUNT” may contain a number. Other fields will contain text. Examples of text fields would be things like “DOC_TITLE”, “SUBJECT”, “AUTHOR”, etc. When in doubt, it is always safe to select Text.
It is important to also notice if there is a field which contains the full text of the document. Generally this field will be labeled something like “FULLTEXT”, “OCR”, or “EXTRACTED_TEXT”… but it could be named anything. On the Modify Fields screen there is a drop down where you can select which field will be assigned as your OCR / Extracted Text field. This full text field is a global setting and will hide the selected field when you are in Table view, in order to speed up the database.
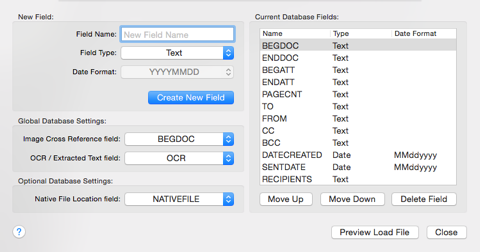
Now that you have collected all of this information about your metadata load file, you can begin creating the appropriate fields. To create a new field, enter the name into the Name box. Choose either Text, Number, or Date from the Type box. If the Type is Date, please choose the appropriate date format from the Date Format box. Note that Date fields must adhere to one of the three format choices. If your date field metadata is in some other format, it is recommended that you select Text for the field type instead.
Finally, click Create New Field. If you made a mistake, you can highlight the field in the table on the left and select Delete Field. If you need to change the field order, you can click Move Up or Move Down.
Under Global Database Settings, you can choose which field to match Images based on (this is usually the first field in your metadata load file). You can also choose which field is your OCR / Extracted Text field. This field will be hidden in the List view to speed up the database. Finally, if your production includes a field with the location of the native file associated with a document record, you can select this field under Native File Location:
